 Sweeten up your text art with this strawberry text effect tutorial. Learn how to use custom brushes and the appearance panel to your advantage when customizing typography.
Tutorial Details: Strawberry Text Effect
- Program: Adobe Illustrator CS5-CC 2014
- Difficulty: Intermediate
- Topics Covered: Custom Brushes, Appearance Panel, Offsetting Paths
- Estimated Completion Time: 30 Minutes
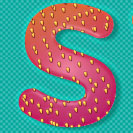
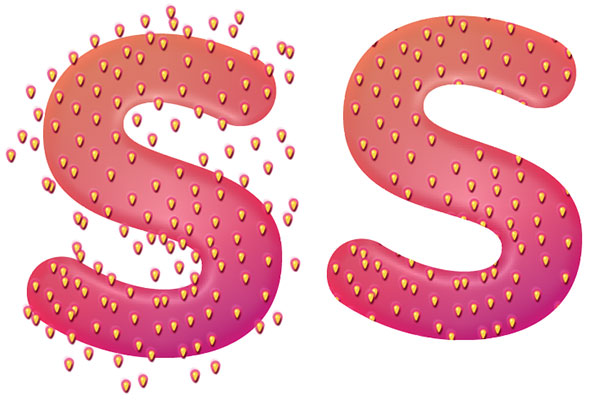
Final Image: Strawberry Text Effect Treatment
Step 1
To begin this summery sweet strawberry text effect tutorial, start with a rounded sans-serif font, like Gotham Rounded Bold. Select your font, Expand the text under Object, and change the color to a bright pink (like #E62357). Ungroup your text so we can focus on one letter at a time.
Step 2
In the Appearance panel, add a New Fill above the first one and apply a Linear Gradient using the Gradient panel. This gradient goes from Orange (#F37F2F) to Pink (#EA2654) to Dark Magenta (#BB0670) at an approx. 69° angle.
Step 3
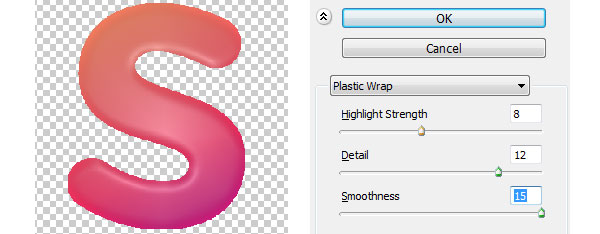
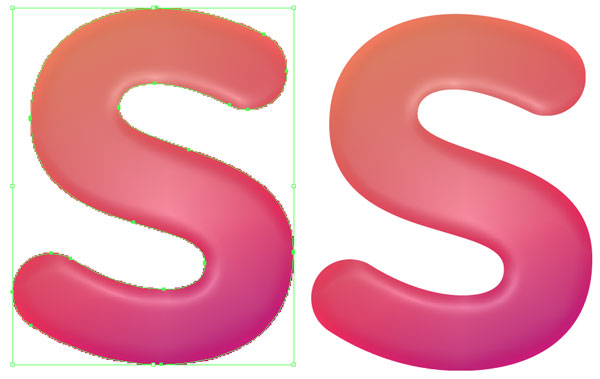
Under the gradient fill in the Appearance panel, apply a Plastic Wrap effect with the following attributes: Highlight Strength: 8, Detail: 12, and Smoothness: 15. You’ll find this effect under Effect > Artistic > Plastic Wrap.
Step 4
Since we applied a raster effect, the edges of the letter are pixelated. Copy (Control-C) and Paste (Control-V) the main S-shape. Make sure to remove the effects and gradient fill from the copied shape, as they are unnecessary and only contribute to a larger file size. Set the fill color to null, Align with the original S, and Create a Clipping Mask (Control-7). Now we have a clean, vector edge. We’ll be using this clipping mask again in this tutorial.
Step 5
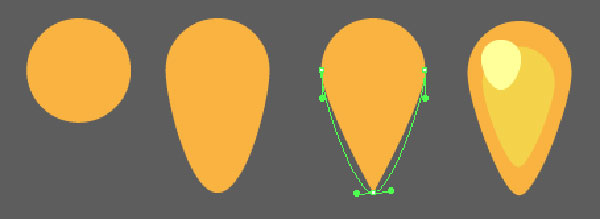
Let’s make some strawberry seeds for this strawberry text effect! Use the Ellipse Tool (L) in order to draw a circle. Drag the bottom anchor point downward using the Direct Selection Tool (A) so it forms a teardrop shape. I found it easiest to soften up the curve of the shape by using the Anchor Point Tool (Shift-C) to convert the bottom to a point and carefully drag the handles back outward to the curve that I wanted. Repeat in light yellow and cream for smaller shapes to serve as highlights. Group(control-G) together your seed shapes.
Step 6
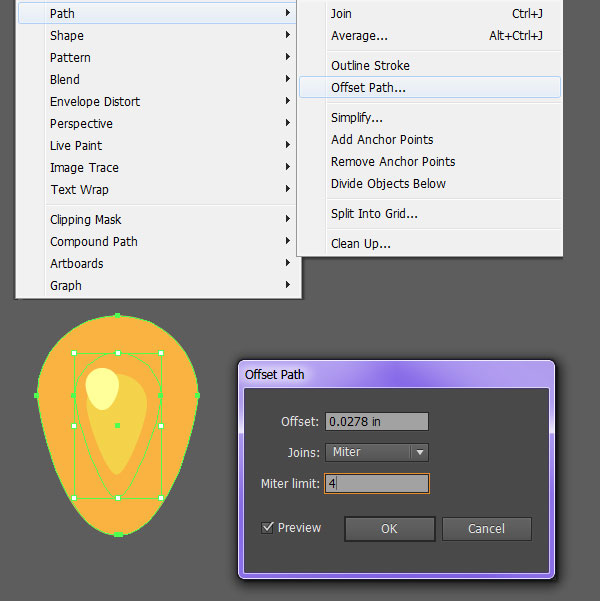
Select the larger shape with the Direct Selection Tool and go to Object > Path > Offset Path. Input 0.0278 inches (or so, as it really depends on what size your objects are. Make sure Preview is selected in order to determine the right offset size).
Step 7
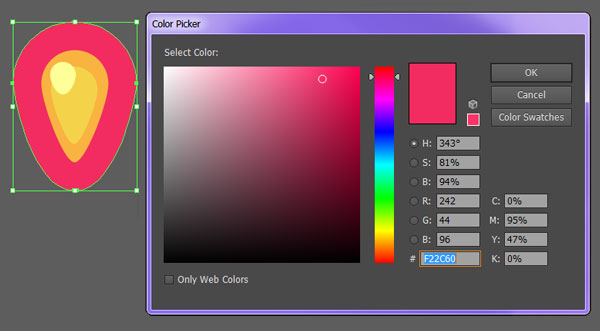
Select your new, large shape and change the color to a bright pink (#F22C60).
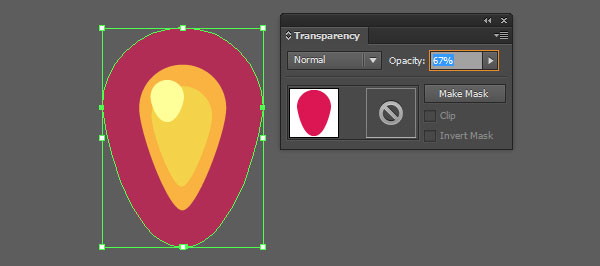
Step 8
In the Transparency panel, reduce the Opacity to 67%, or so, and the Blend Mode to Multiply.
Step 9
Select the yellow seed group and apply a Drop Shadow effect (go to Effect > Stylize > Drop Shadow in the Appearance panel) with the following attributes:
Mode:
- Multiply
Opacity:
- 75%
X Offset:
- 0.01 in
Y Offset:
- 0.03 in
Blur:
- 0.01 in
Color:
- #3A0312

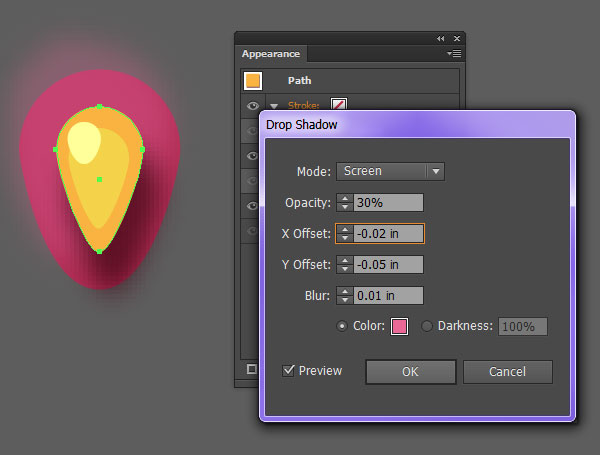
Step 10
Repeat adding a Drop Shadow effect but with the following attributes:
Mode:
- Screen
Opacity:
- 30%
X Offset:
- -0.02 in
Y Offset:
- -0.05 in
Blur:
- 0.01 in
Color:
- #FF7BA4
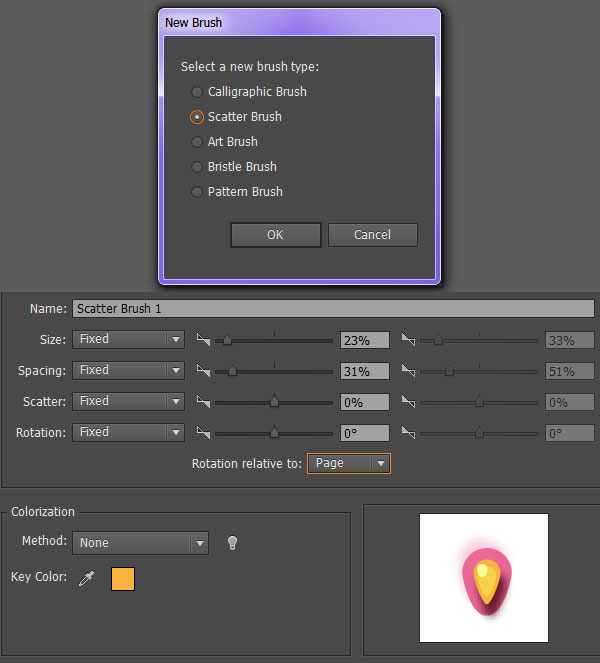
Step 11
Group together your seed components. In the Brushes panel create a new Scatter Brush whose rotation is kept relative to the page. The other attributes will depend on the size of your seed components in relation to your lettering and may take a few edits to get just right. Note that mine needed to be scattered and scaled down a bit compared to the brush’s default size. Edit brushes by selecting them in the Brushes panel and hitting Enter.
Step 12
Use the Paintbrush Tool (B) to draw a few messy, scribbly lines over your strawberry text effect letter with your new Scatter Brush.
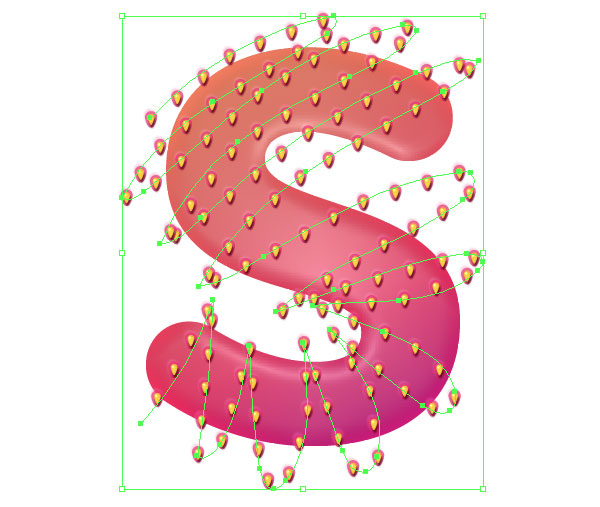
Step 13
Once satisfied with the seed coverage, Group the strokes together and place this group within the S’s Clip Group underneath the Compound Clipping Path line in the Layers panel. Doing so will include the seed paths in the clipping mask made previously.
Step 14
Repeat Steps 2-13 of this strawberry text effect tutorial on the other letters. You can take a few shortcuts by creating a clipping mask out of a group of letters or applying some of the attributes in the Appearance panel to an entire group, but the Plastic Wrap effect will work best when applied to individual objects.

Step 15
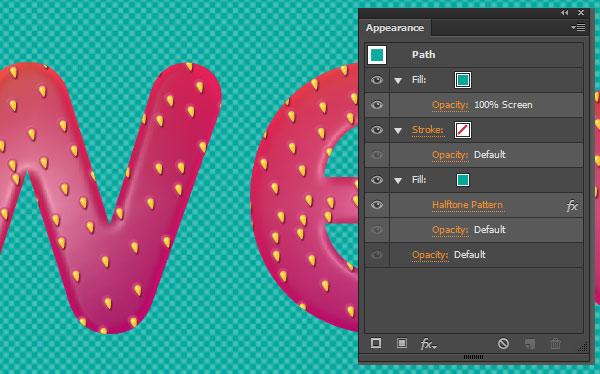
For a quick background, draw a large rectangle over the Artboard with the Rectangle Tool (M). Apply the fill color of your choice. In the Appearance panel, create a new fill below the main fill. Set the main fill’s Blend Mode to Screen and apply a Halftone Pattern effect to the secondary fill (the effect is found under Effect > Sketch > Halftone Pattern.
Step 16
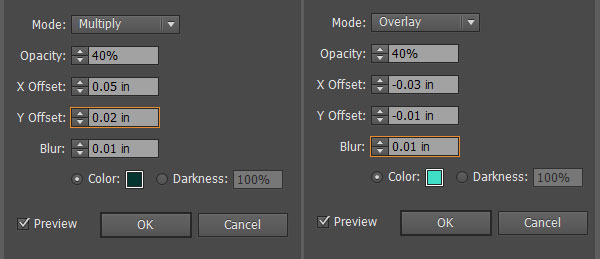
Finally, select your completed text, and apply the two Drop Shadow instances in the Appearance panel.
Instance A
Mode:
- Multiply
Opacity:
- 40%
X Offset:
- 0.05 in
Y Offset:
- 0.02 in
Blur:
- 0.01 in
Color:
- #05352F
Instance B
Mode:
- Screen
Opacity:
- 40%
X Offset:
- -0.03 in
Y Offset:
- -0.01 in
Blur:
- 0.01 in
Color:
- #40DDC6
Great Job, You’re Done!
Push your design further by creating bitten or sliced strawberry letters with this strawberry text effect. Or, keep them growing with leaves, vines, and a whole strawberry plant. What other fruit or veggie letters can you create in Illustrator? Have a happy summer!

Author: Mary Winkler
Mary works under the brand Acrylicana® designing apparel, jewelry, and illustrating for companies like Disney, Jakks Pacific, Envato, and more. Check out Acrylicana.com for more artwork, tutorials, and more.
The post Sweet Strawberry Text Effect! Perfect Summer Font appeared first on Vectips.
Sweet Strawberry Text Effect! Perfect Summer Font
Geen opmerkingen:
Een reactie posten