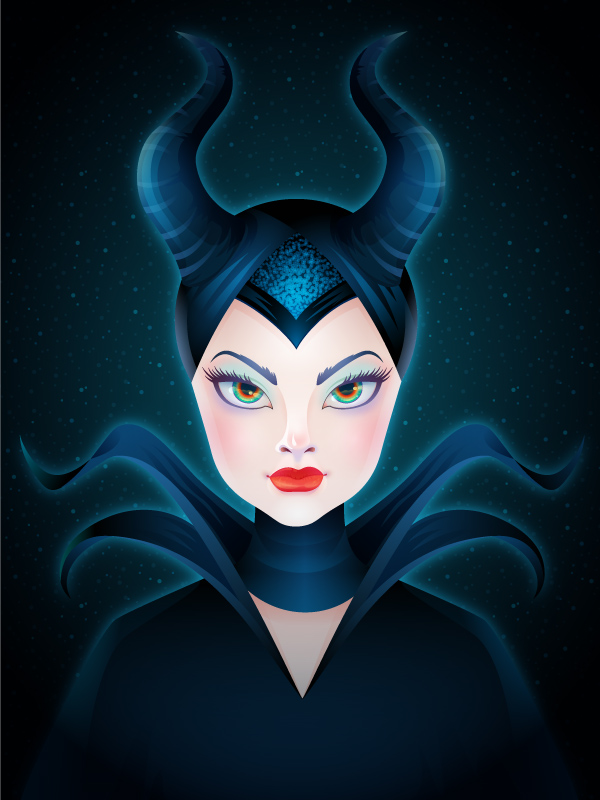
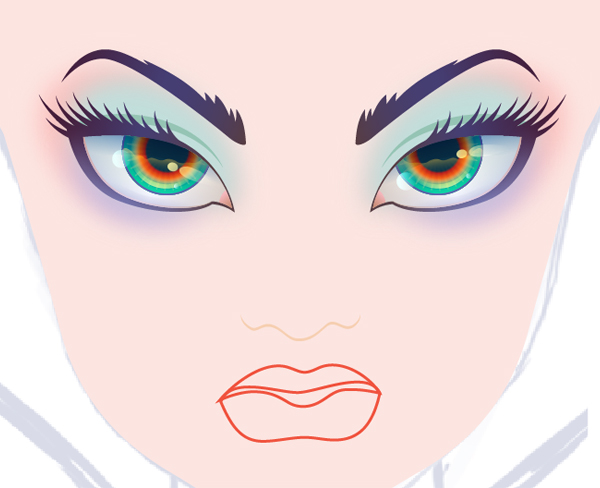
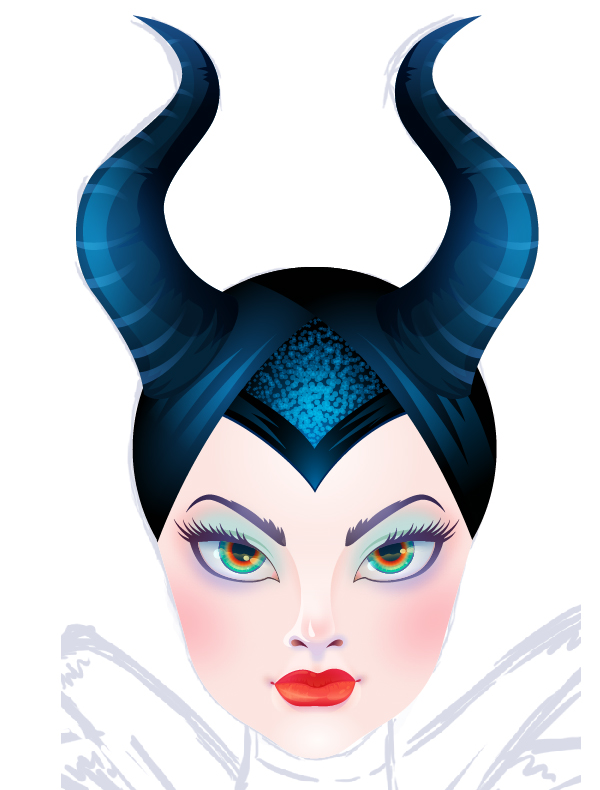
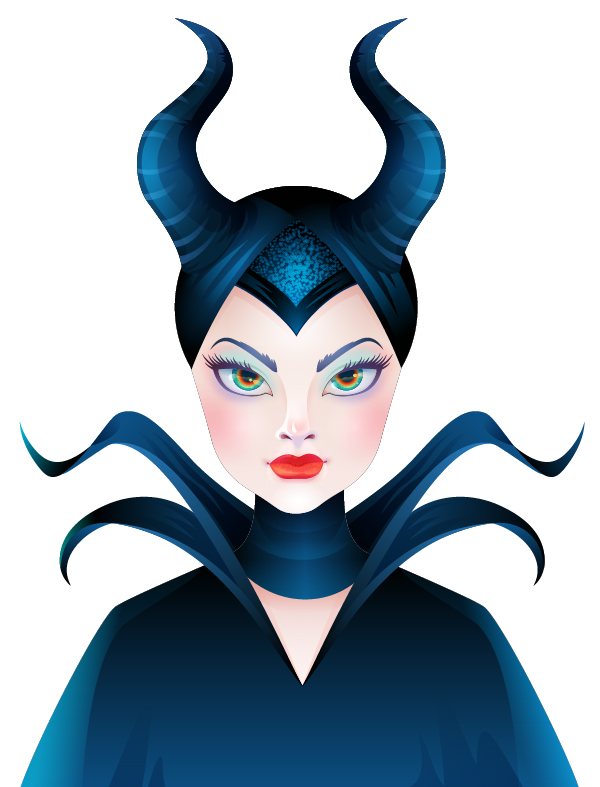
In this tutorial we will discover how to draw a bewitching stylized portrait of Maleficent in Adobe Illustrator. We’ll be using various effects, such as Blur effect for soft shadows and overtones. Let the magic begin!
1. Trace the Sketch in
Outline Mode
Step 1
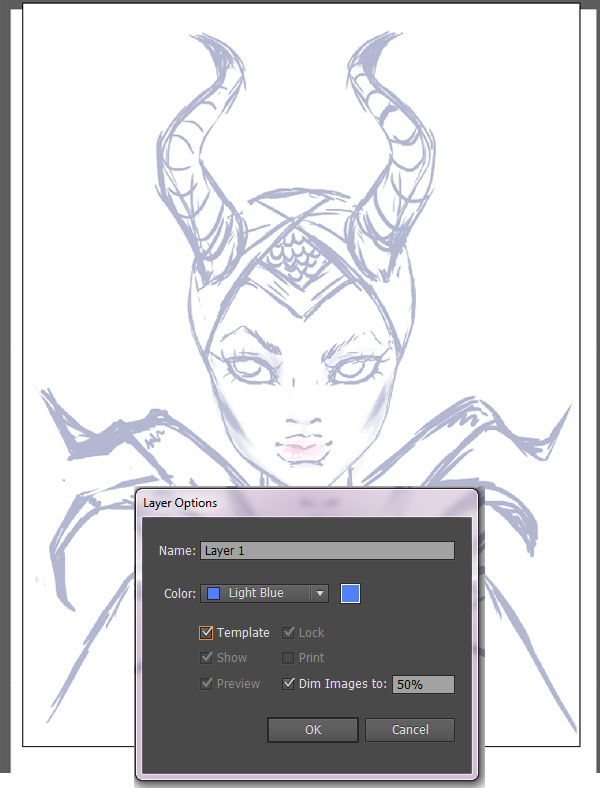
Start by creating a New Document of 600×800 px
size. File > Place your sketch
onto the canvas and click twice on
the layer containing the sketch. Check the Template
tick box in order to lock the layer automatically and to make it more
transparent (the Dim Images to
option should be checked by default).
Step 2
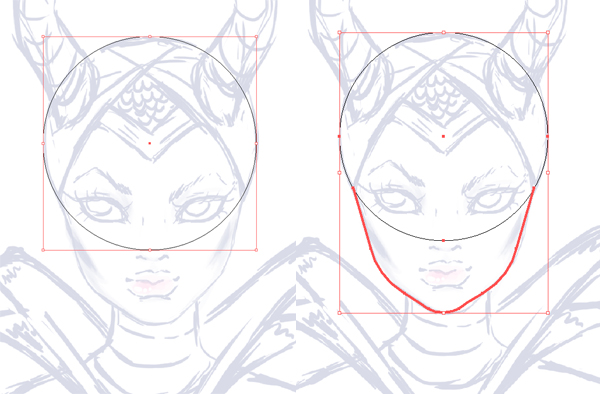
Switch to the Outline Mode (Control-Y) to make your sketch visible under the
shapes and lines we’ll be creating.
Grab the Ellipse Tool (L), make a circle and place it over the upper part of Maleficent’s
head. Draw out the jaw with the help of the Pen Tool (P). You can actually draw only left part of the jaw and
then just use the Reflect Tool (O) to reflect it over the vertical axis and combine those two parts into
a single smooth shape by selecting them both and pressing Control-J.
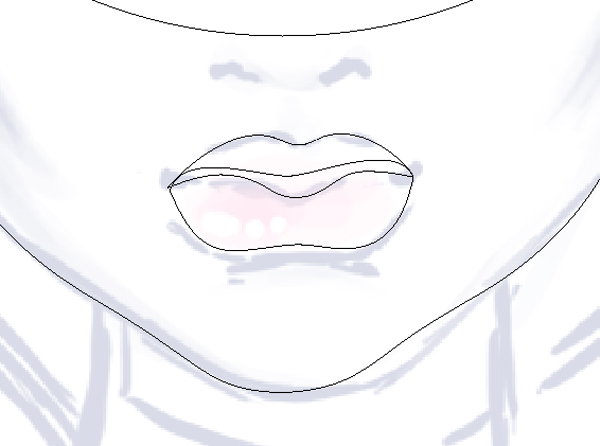
Step 3
Draw out the lips. You don’t have to be
super-precise at this step as you will be able to edit those shapes later, in process
of coloring.
2. Create Maleficent’s Eyes
Step 1
Create an almond-like basic eye-shape with
the help of the Pen Tool (P) or Pencil Tool (N). Add a few other details while remaining in the Outline Mode: a circle for the eyeball; a shadow from
the upper eye-lid; an inner eye-corner and a shadow from the
lower eye-lid. Don’t worry if the shapes are overlapping each other and seem to
be out of the basic shape’s boundaries. Use the copy of the basic eye-shape to place all
other objects in the Clipping Mask.
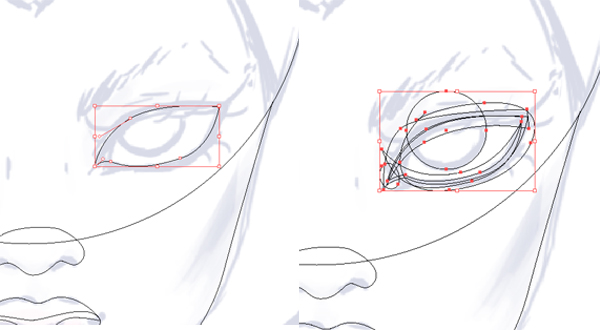
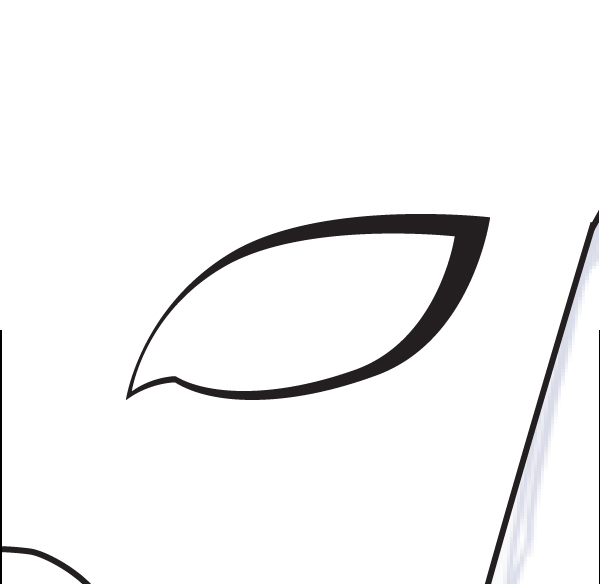
Place another shape, slightly larger than the basic eye-shape, on the
bottom and fill it with black color to form the eyeliner.
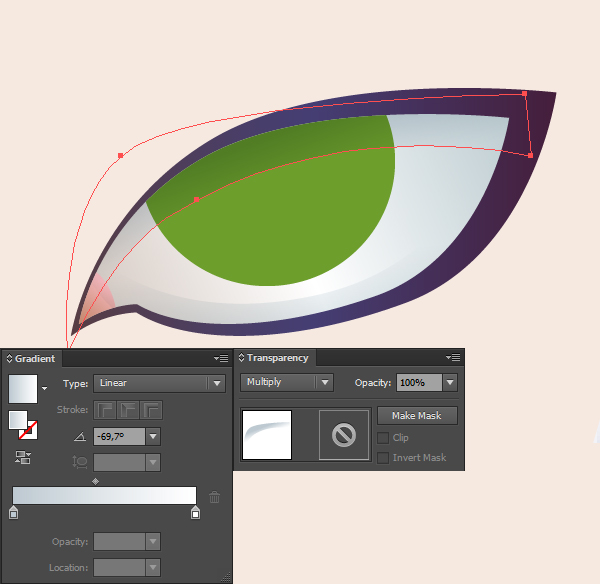
Step 2
Turn back to normal Preview Mode (Control-Y) and start applying the colors to all the shapes we’ve made in our previous step. Switch the
shadows from the eye-lids into Multiply Blending Mode and fill
them with a gentle linear gradient from light-grey to white.
Step 3
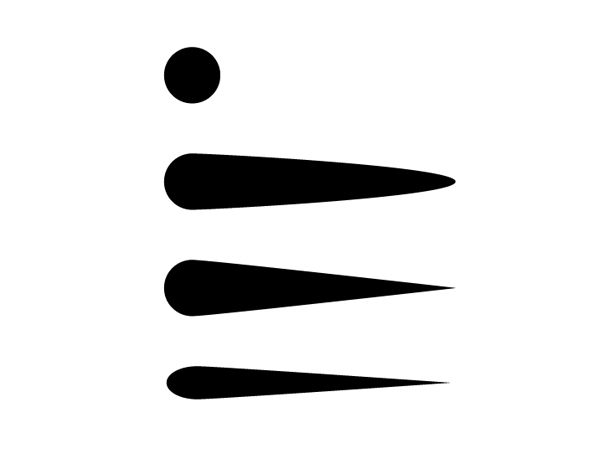
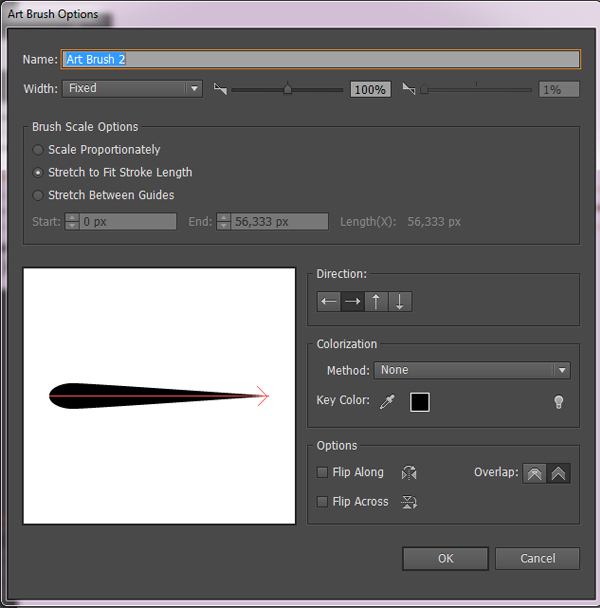
Let’s make a simple brush for separate eyelashes.
Create a circle and drag it’s right
anchor point farther right with the Direct
Selection Tool (A). Convert the selected anchor point to corner by clicking
it once with the Convert Anchor Point
Tool (Shift-C). Finally, squash the shape a bit.
Drag the created shape to the Brushes
panel and make an Art Brush,
leave all the settings as default.
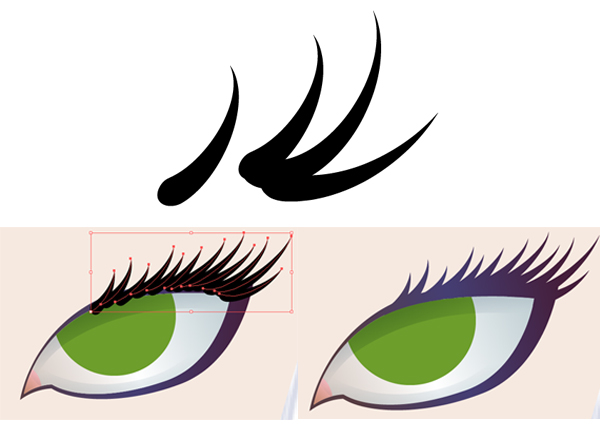
Step 4
Take the Paintbrush Tool (B) and try making a few strokes. You can make the Stroke value smaller or larger to your
convenience. Draw the eyelashes, varying their length. Object > Expand Appearance and delete the unneeded pieces with
the Eraser Tool (Shift-E). Select both the eyelashes and the eyeliner, Unite them in Pathfinder and apply a
linear gradient from dark lilac to dark blue, creating a nice glowing makeup effect.
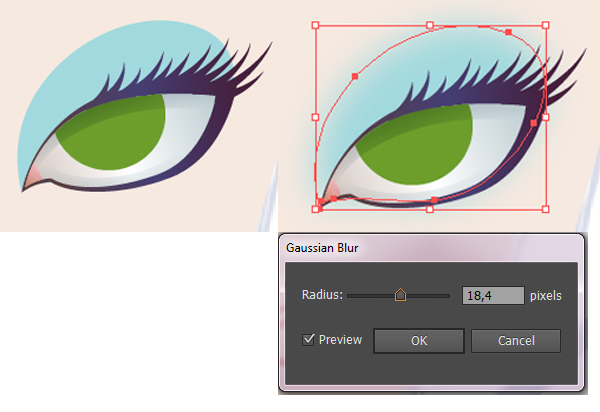
Step 5
Draw a light-blue shape and place it under
all the other shapes (Shift-Control-[). Go
to Effects > Blur > Gaussian Blur.
Set the Radius value to approximately 18
pixels in order to create a gentle smoky-eye effect.
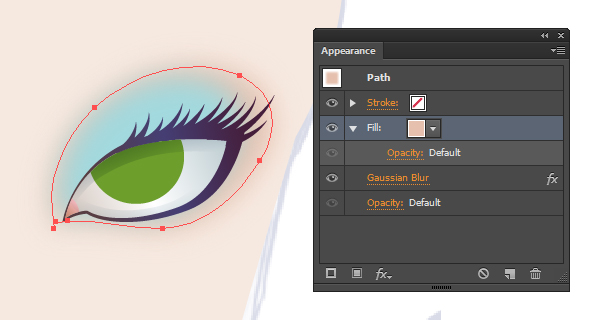
Step 6
Create another shape and place it under the
blue one. Fill it with a color slightly darker than the skin-tone. Apply the
same blur effect to the shape.
Step 7
Draw a blurred shape of
light-lilac color under the eye. Add some minor details: tiny highlight sparks
over the iris and a curved stroke across the upper eye-lid.

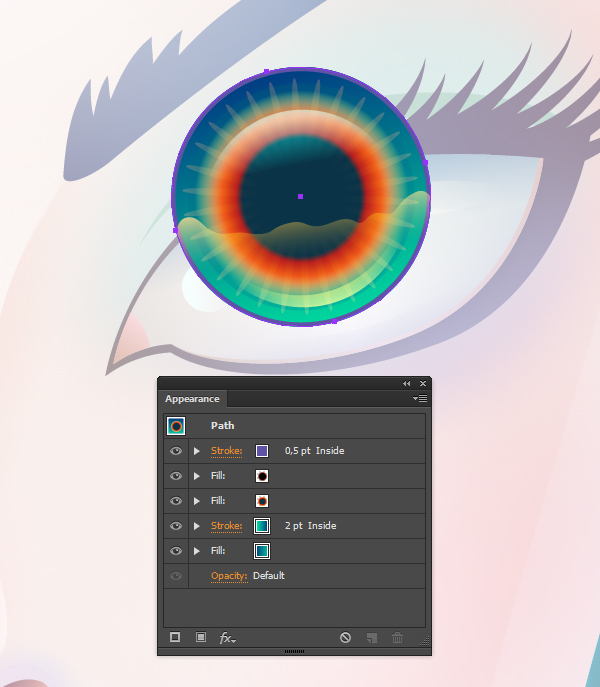
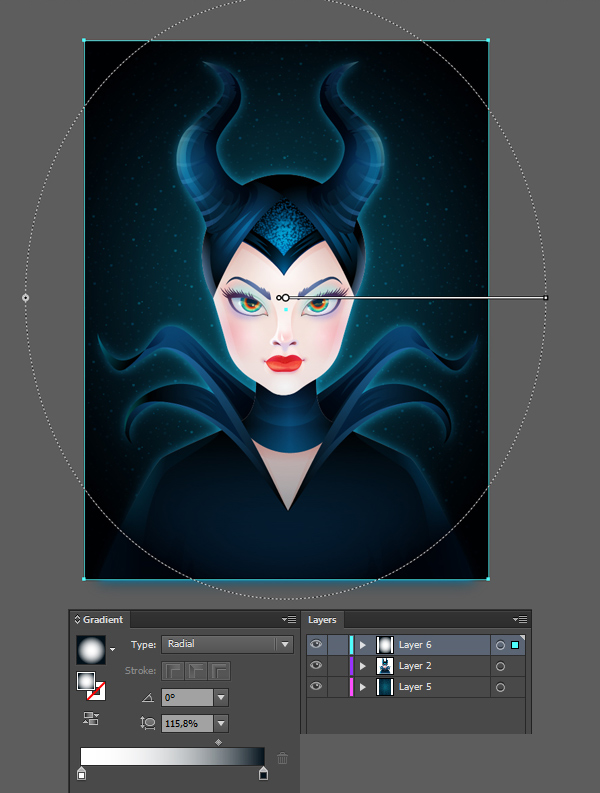
Step 8
Enter the Isolation mode inside your Clipping
mask and make the iris more realistic and bright with the help of the Appearance panel by adding new fills
and radial gradients, as shown on the screenshot (check out the Vibrant Peacocktutorial: Part 1, Step 3 and further for a more descriptive process of creation).
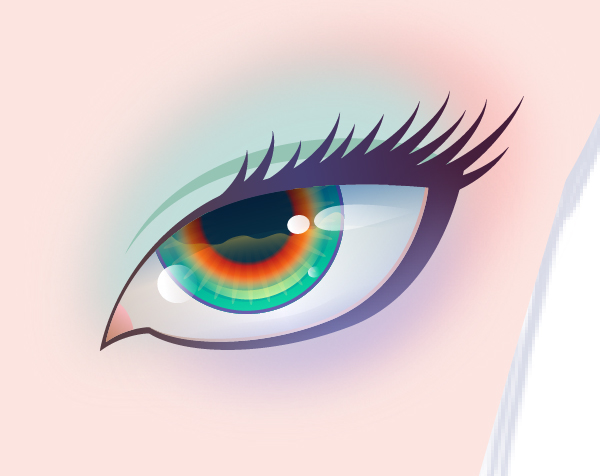
Step 9
Quit the isolation mode and let’s see how
the whole eye looks now.
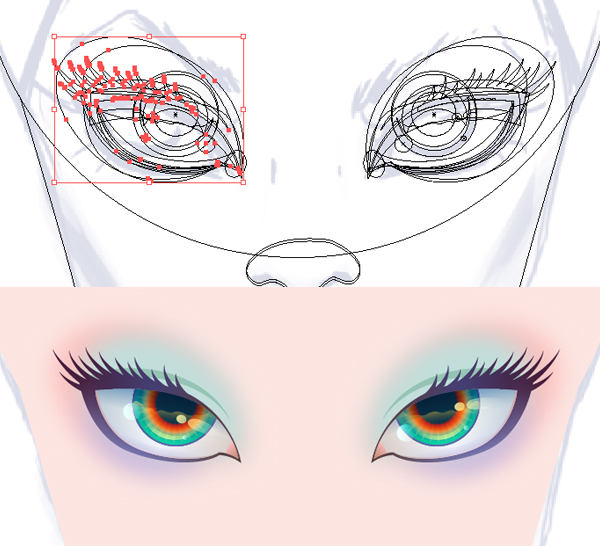
Step 10
Copy the eye, reflect it over the vertical
axis with the Reflect Tool (O) and place it on the other part of her face,
according to our sketch.
Step 11
Draw a curved eyebrow with the Pencil Tool (N).
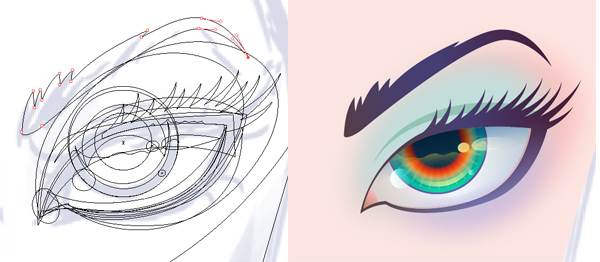
Add the second brow and the eyes are finished.
3. Render a Pretty Nose
Step 1
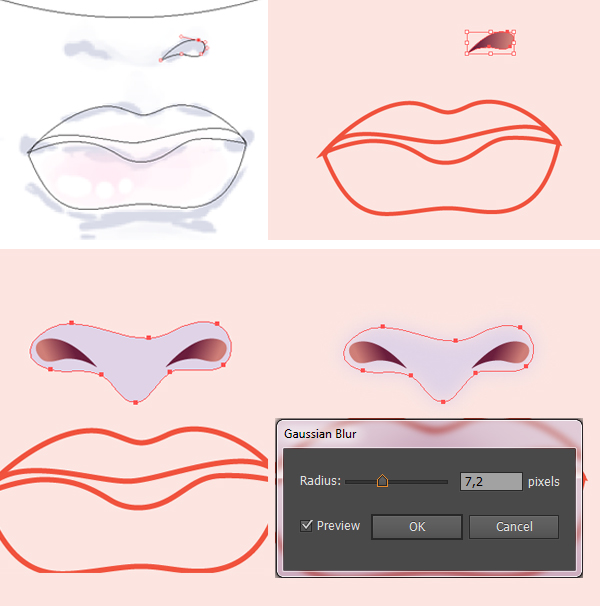
Start by forming a tiny nostril with the Pen Tool (P). Fill it with linear
gradient from darker brown to light brown in order to show the cavity. Add the
second nostril and surround the nostrils by a freehand curvy shape. Fill it with
pale lilac color and apply the Gaussian Blur
effect to create a gentle shadow under the nose tip.
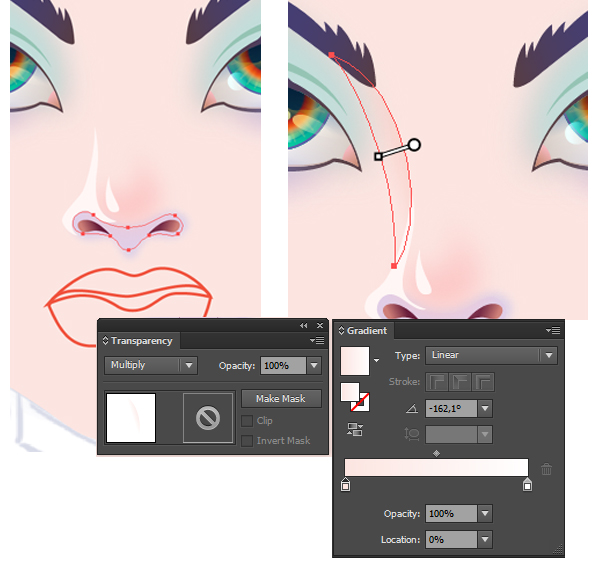
Step 2
Add some more details to make the nose more
realistic! Put a pink burred spot on the tip of the nose and draw a white
highlight above it with the Pencil Tool (N).
Finally, draw a half-moon shape between the eye and the nose bridge and fill it
with linear gradient from white to light-pink. Switch it to Multiply Blending Mode in order to create a
shadow and to emphasize the sculpture of the nose. Don’t forget to put the same
shadow along the right side on the nose.
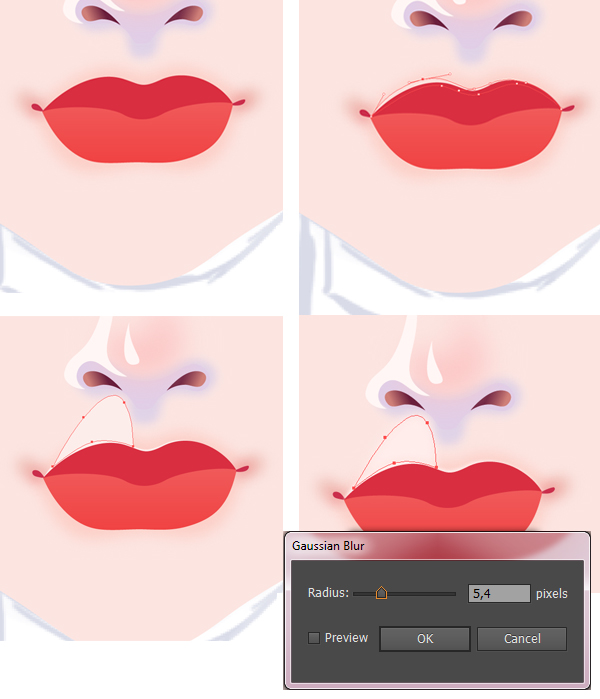
4. Create Tempting Red Lips
Step 1
Ripe red lips are one of the most
outstanding features of Maleficent’s face. Let’s do our best to make them vivid
and living! Duplicate the outlines that we’ve created for the lips earlier and
fill them with a darker skin-tone, also adding two dark spots in both
corners of the lips. Apply the Gaussian
Blur effect to these objects.
Step 2
Bring
to Front (Control-Shift-])
the lips outlines, placing them above the blurred shapes. Fill the lower
lip with a gentle linear gradient from pale-rose to red and apply the darker
red color to the upper lip. Emphasize the upper lip by adding a thin curved
white line along the lip. Add another bright shape under the nose and apply Gaussian Blur effect to it, forming a ridged philtrum.
Step 3
It’s time to add more details! Make a shape,
crossing the lower part of the lower lip to darken the lip. Cut
off the unneeded part using the Shape
Builder Tool (Shift-M) and fill the shape with a light gradient from white
to dark-red, switching the Blending Mode
to Multuply. Draw a wrinkled
line over the lower lip, creating a highlight. Add few more wrinkled lines on
the lips, making them sleek and shiny. Use the Screen Blending Mode for bright highlights.
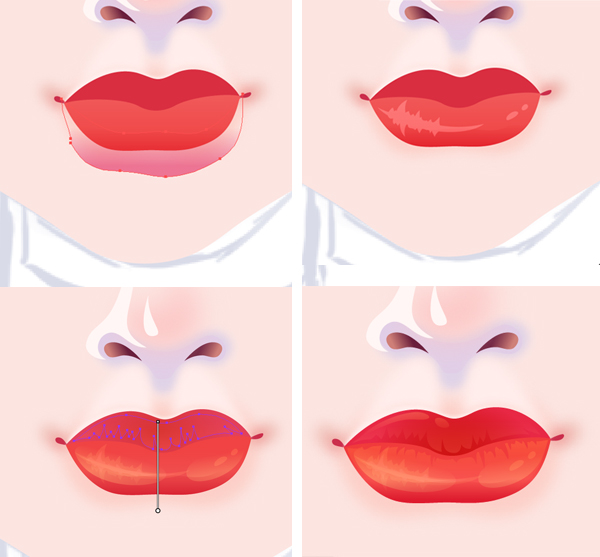
Step 4
The last but not the least thing to do with
the lips is to add a blurred highlight next to the corner of the lip and the
second one on the other side of her mouth. Finally, make the lips more
dimensional by putting a light shadow under the lower lip.
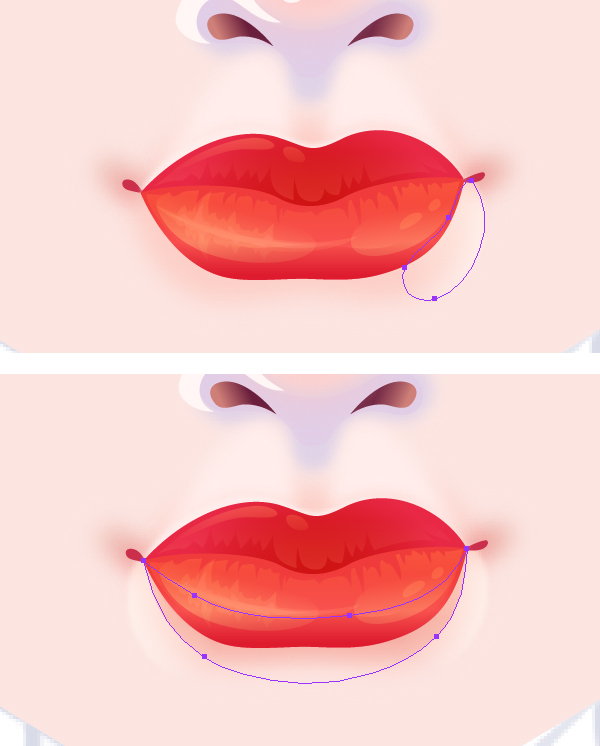
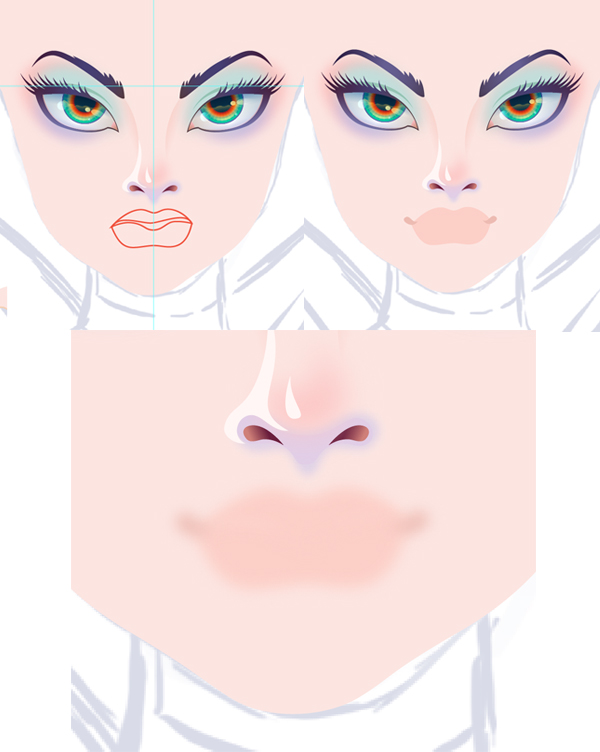
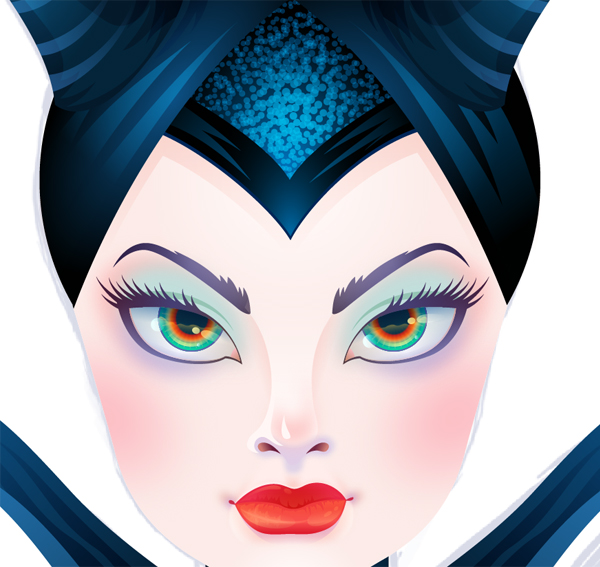
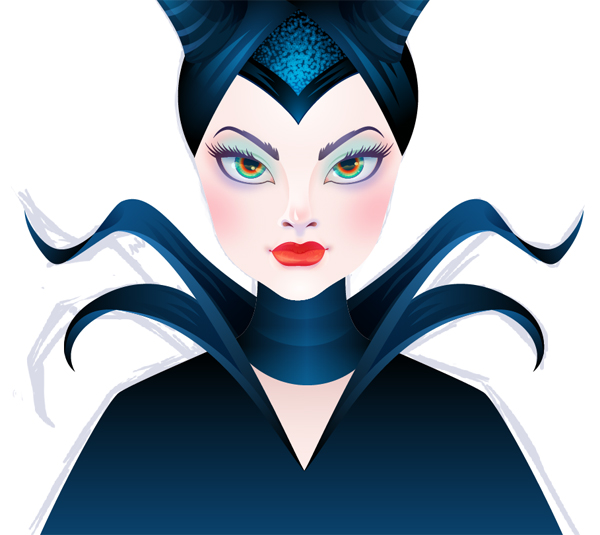
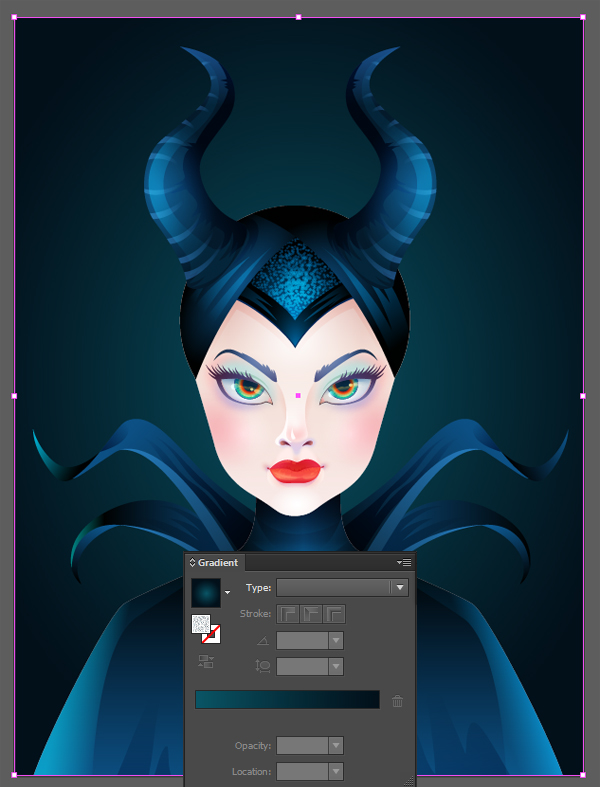
Here is the Maleficent’s overall look at
this step:
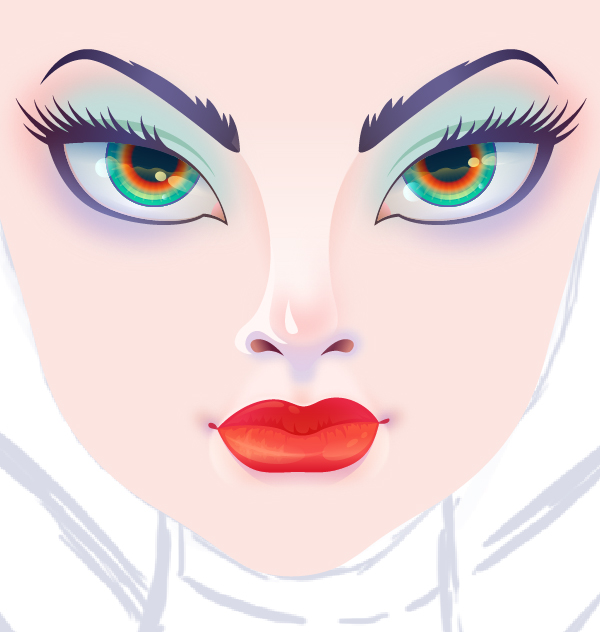
Let’s move on to her skin and crown.
5. Finish Her Makeup and Sculpt Those
Crooked Horns
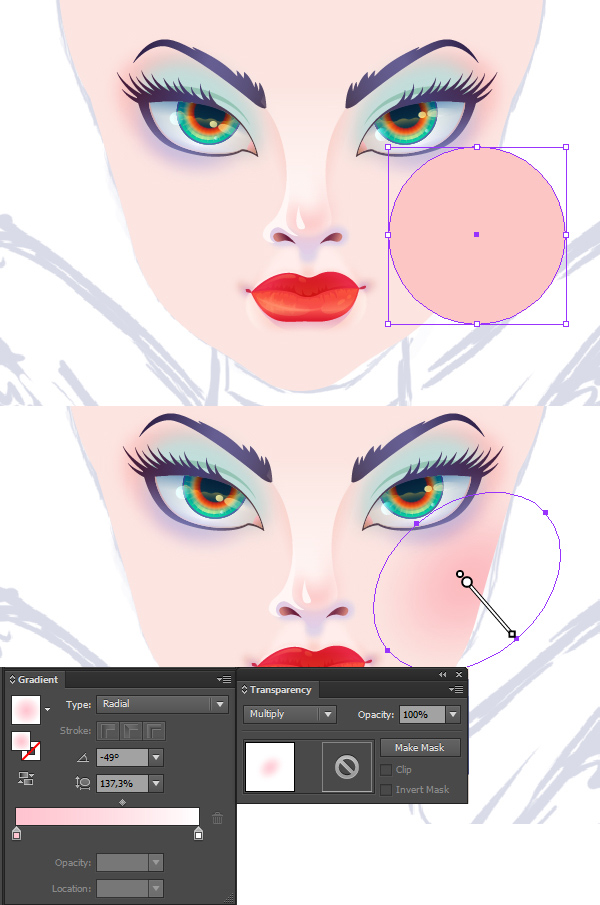
Step 1
As our portrait is cartoon and stylized, we
won’t be making her check-bones too sharp in order not to make the face too
skinny and to preserve the dollish look. We’ll add some tender blush instead. Draw
a circle and hide it in the Clipping
Mask, using the copy of the basic head shape. Fill it with the radial
gradient, filling the center with light-rose color and the outer part with
white color. Switch the shape to Multiply Blending Mode. Add some blush to her second cheek as well.
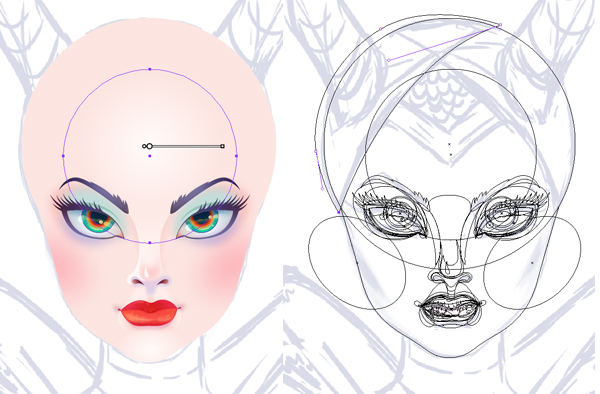
Step 2
Add another circle over the middle of
Maleficent’s forehead to make her head more spherical. Use the Screen Blending
Mode to spotlight the whole area.
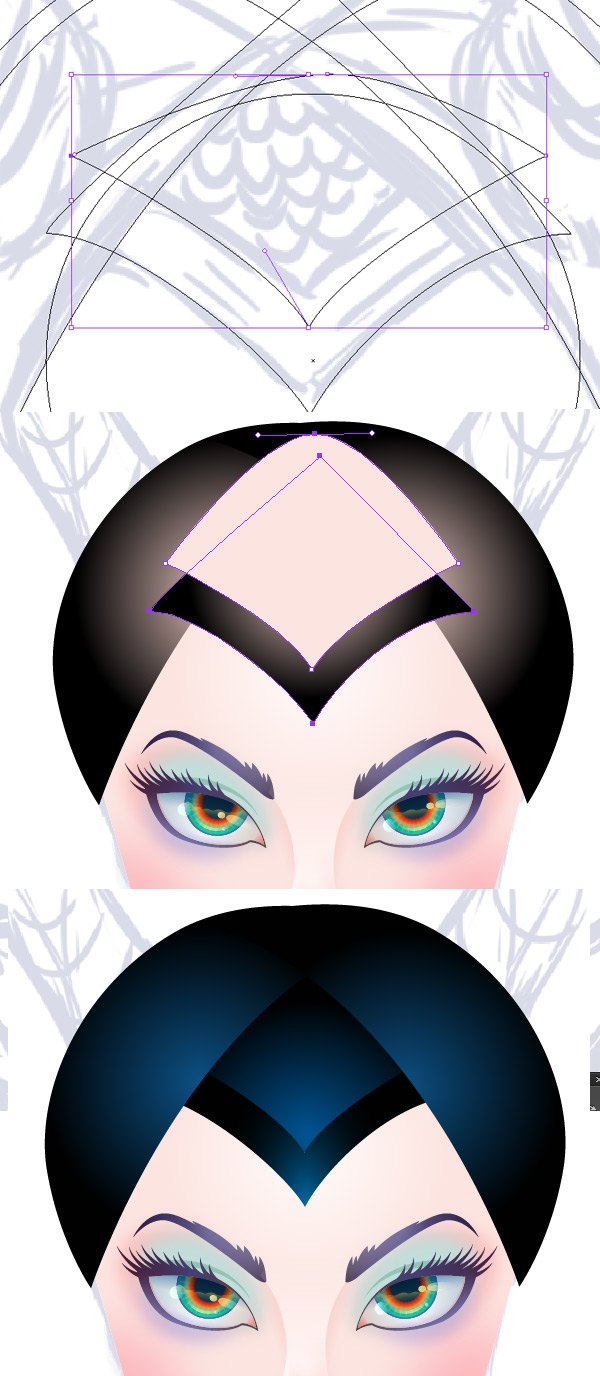
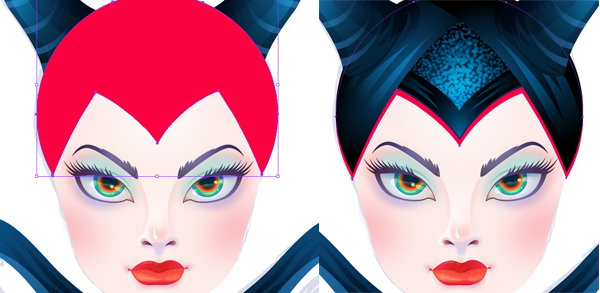
Step 3
Let’s start rendering the headdress. As
before, switch to Outline Mode
(Control-Y) and start tracing your sketch from the middle part. Return back
to normal mode, checking the result. Apply dark-blue colors to created
shapes.
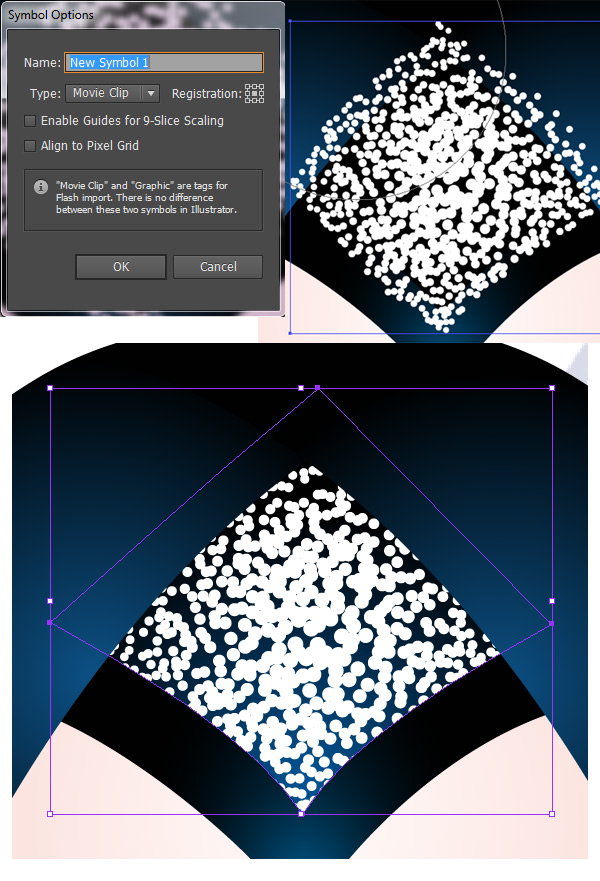
Step 4
Now we need to create a sparkling texture for some chic. Make a small white circle and drag it to
the Symbols Panel, creating a Movie Clip with default settings. Use
the Symbol Sprayer Tool (Shift-S) to
spread the circles over the hat. Make the circles larger in the middle and
smaller at the edges by editing them with Symbol
Sizer Tool, which you can find in the same drop-down menu as the Symbol Sprayer Tool (Shift-S). Click on the objects when you want to make your symbols larger; and hold the Alt key and click when you need to make them smaller.
Finally,
Object > Expand Appearance of the created texture and place it in the
Clipping Mask.
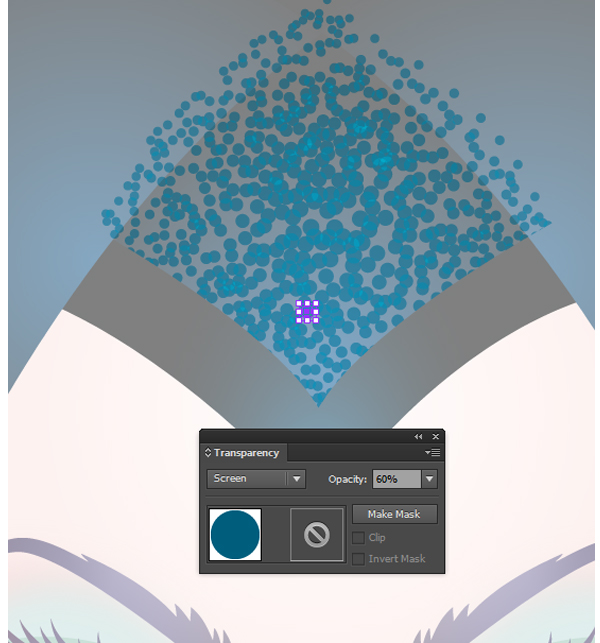
Step 5
Enter the Clipping Mask and fill the circles with dark-blue color, switching them to Screen
Mode and lowering the Opacity
down to 60% so that the overlapping
parts of the circles become visible.
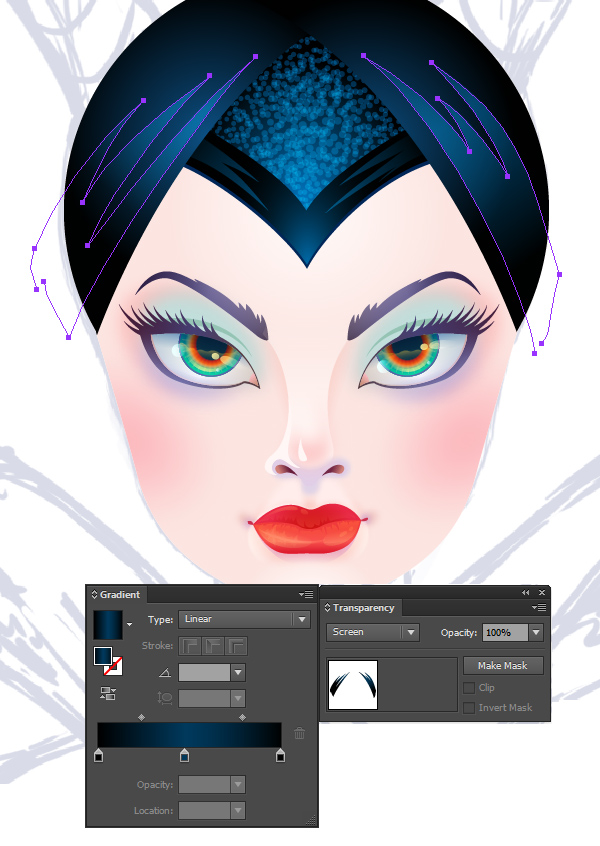
Step 6
Return to normal mode and add some
sharp-edged shapes on both sides of the headdress, creating the illusion of a
folding fabric. Fill them with a three-colored dark-blue gradient and switch to Screen Mode.
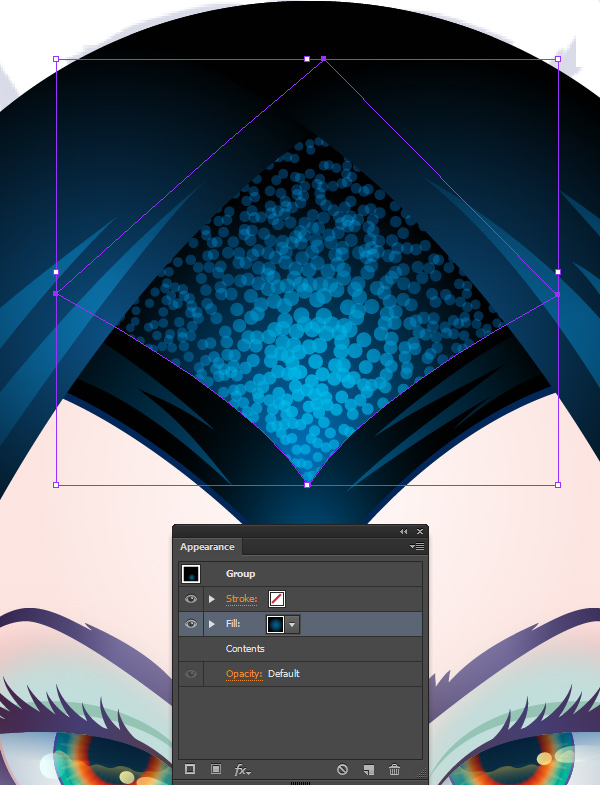
Step 7
Copy and Paste in Front (Control-C > Control-F) the texture
group and fill it with dark-blue radial gradient, switching to Screen Blending Mode
and thus making it brighter.
Step 8
Start drawing out one of the horns in the Outline Mode.
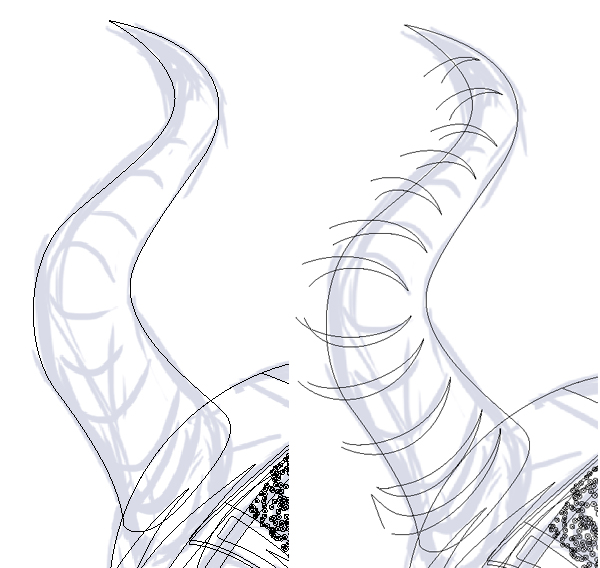
Step 9
Edit the colors so that the horns fit the headdress
nicely. Make the notches lighter with the help of Screen Mode and add a smooth highlight over the horn, making it
glossy.

Step 10
Copy the created horn and place its
reflected copy on the second side of the head.
Step 11
In order to separate the headdress from the face, making it more dimensional, we also need to
put a shadow under it. For this purpose, duplicate all parts of the hat and Unite them in Pathfinder, thus combining them into a single shape. Place this shape under
the headdress and move it down a bit.
Finally, fill the shape with the same color
as we have under the lower lip (use the Eyedropper
Tool (I) to pick up the color and appearance), forming a gentle
shadow.
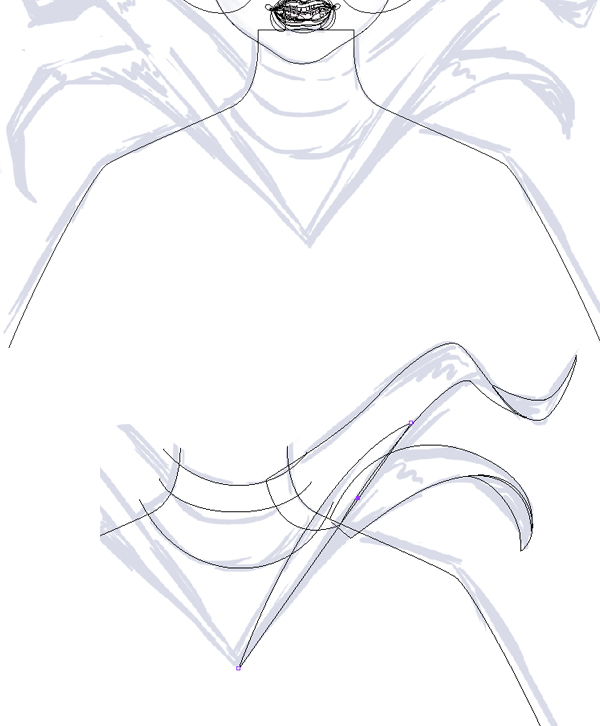
6. Style the Dress
Step 1
Start by tracing the basic shape of the
dress and add a few parts of the neck piece. Draw the pleats separately from
each other, so that we’ll be able to color them differently.
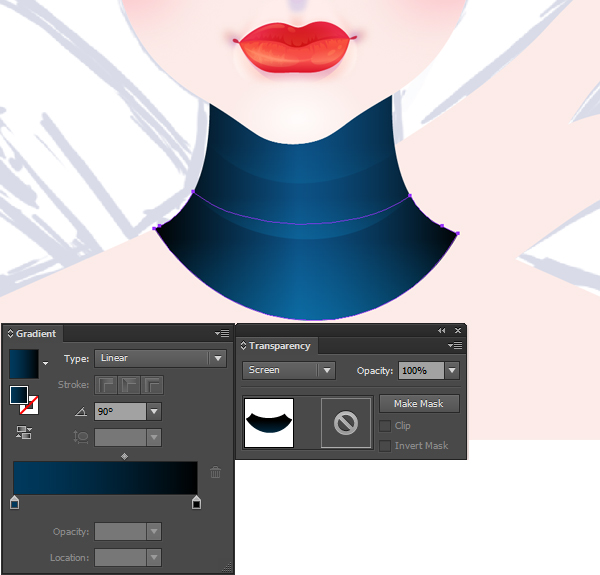
Step 2
Form a collar consisting of three pieces
around her neck. Fill them with dark blue linear gradient. To emphasize the silk texture, duplicate each part and switch the Blending Mode to Screen.
Step 3
Color the pleats according to the headdress color palette and apply the Multiply Blending Mode to those shapes which
stand for the shadows.
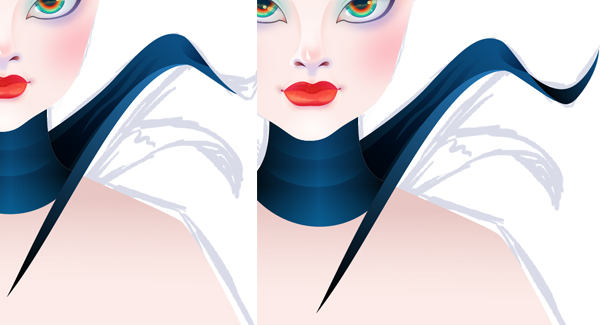
Step 4
Rearrange the shapes so that some of their
parts are hidden behind the collar and the front parts are placed above the body. Fill the basic dress shape with the matching dark-blue linear gradient.
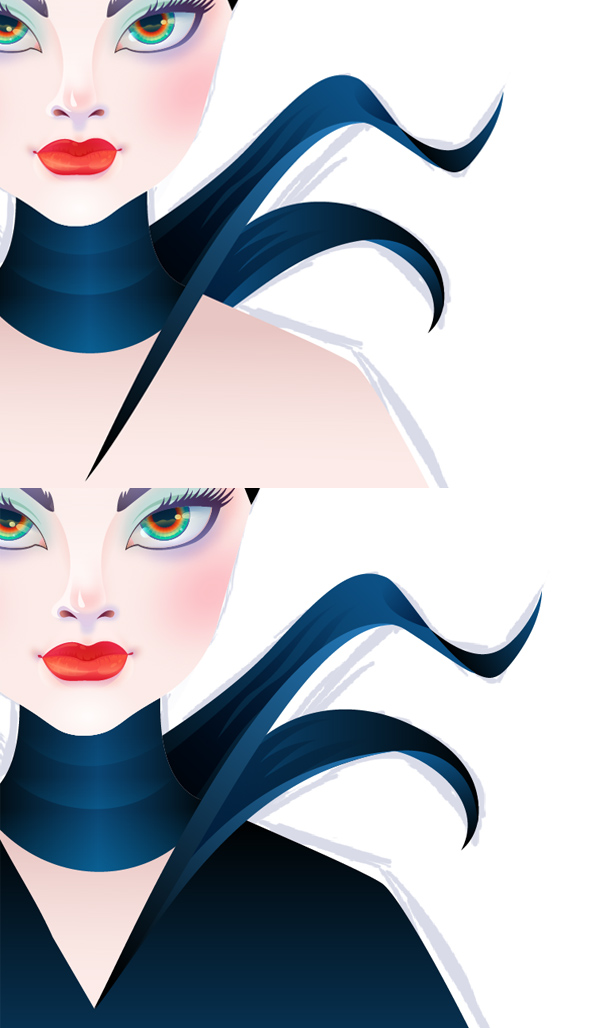
Step 5
Use the Reflect Tool (O) to copy and mirror the objects over the vertical axis, placing them on the opposite side of the body.
Step 6
Put some shadows from the collar and the
neck piece on the skin of her chest and add a few minor details to the dress:
dark folds in the bottom and bright highlights above the
shoulders.
7. Create a Mysterious Sparkling Background
Step 1
We are on our final straight and the only important thing left to be done is the background! Create a New Layer for the background and place it under all other layers.
Make a rectangle of a 600×800 px
size using the Rectangle Tool (M). Fill
the rectangle with a radial gradient from a very dark-blue on the edges to
greyish dark-blue in the middle.
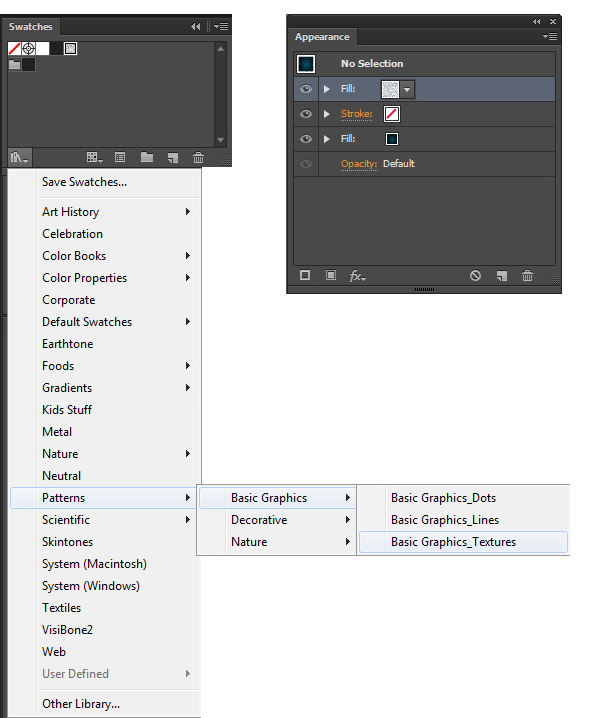
Step 2
Add New
Fill in the Appearance
panel and fill it with a simple spotted texture, which you can find in the Swatch Libraries Menu > Patterns >
Basic Graphics > Basic Graphics_Textures > USGS 22 Gravel Beach. Set
the Blending Mode of this Fill to Screen.
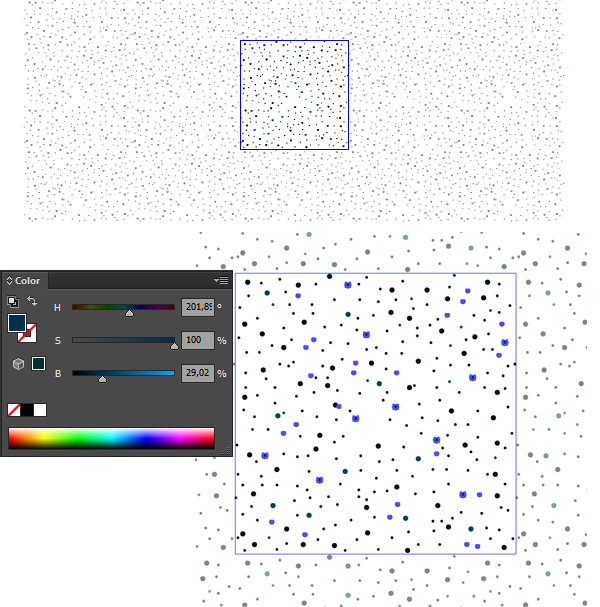
Step 3
Select your texture in the Swatches
panel and enter the Edit Pattern Mode. Select several random spots and fill them with lighter blue color.
Step 4
Exit the Pattern Mode and notice how sparkling the background looks now.
Step 5
The dark background already emphasizes the
main object; however, we want to add more contrast to her face and to make the
character more outstanding. For this purpose, add some narrow extruded shapes along
both parts of her face and on the edges of the horns. Fill the shapes with
linear gradient from black to greyish-blue and switch to Screen Blending Mode, creating a soft highlight.
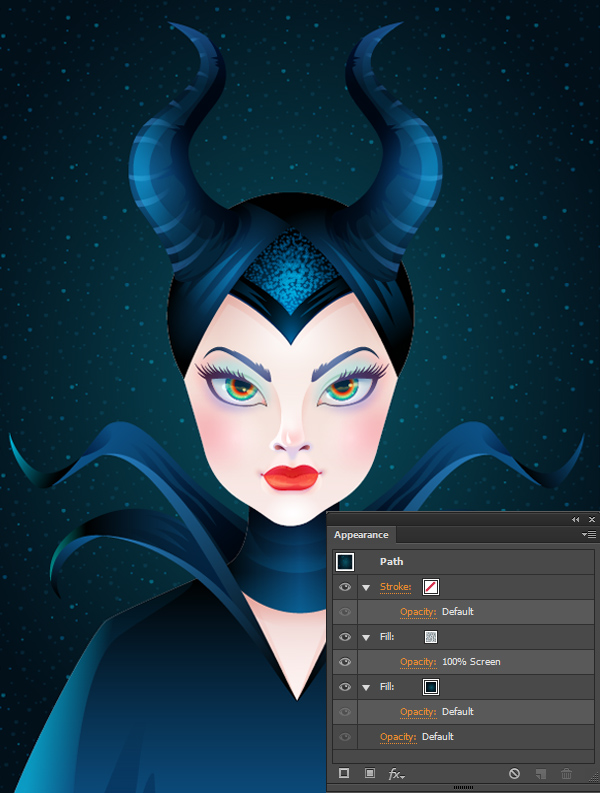
Step 6
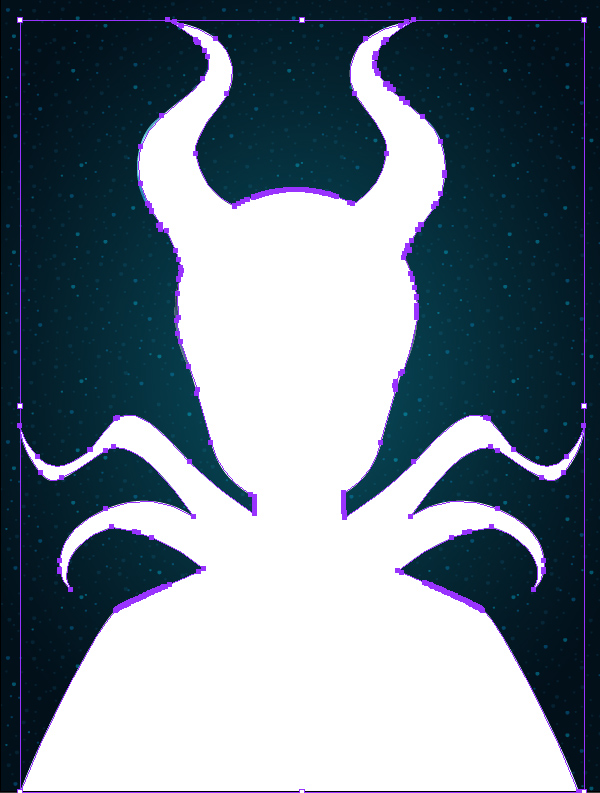
Select all parts of Maleficent, group them
and make a copy. Place the copy above all other objects and Unite it in Pathfinder, creating a flat silhouette.
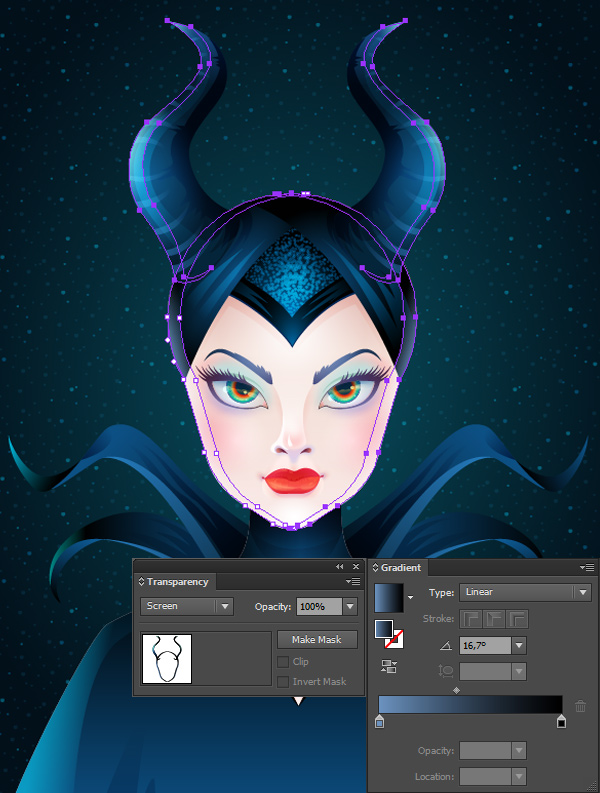
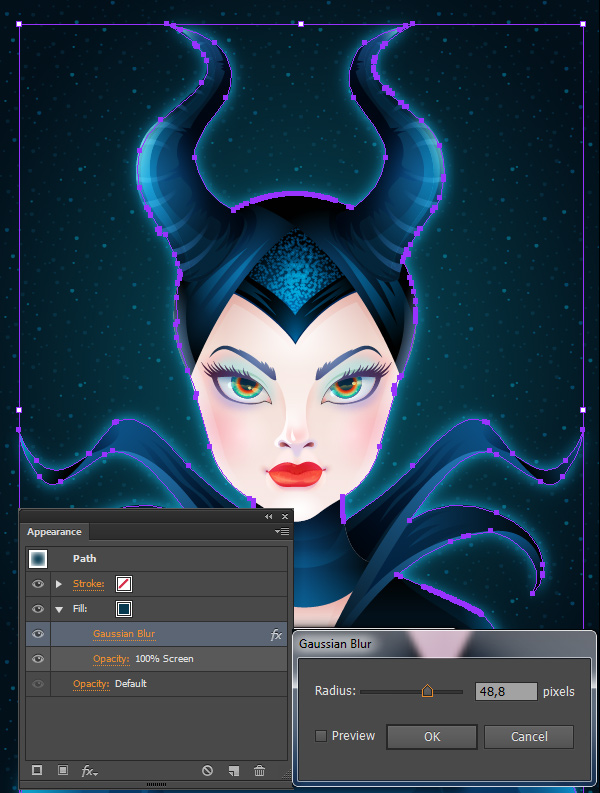
Step 7
Place the created silhouette under the
character and fill it with dark-blue color. Switch the Blending Mode to Screen,
making it visible above the background and apply the Gaussian Blur effect, turning the flat shape into a nice glowing
halo around Maleficent.
Step 8
Our character becomes more noticeable and
stands out nicely above the background. The last thing to do here is to put a
soft vignette and to darken the corners of our artwork, so that the character’s
face becomes the main object of the composition. Put a 600 x 800 px rectangle above all other objects on a separate layer
and fill it with linear gradient from white in the middle to inky-blue
on the edges. Switch it to Multiply Blending Mode to make the center of the vignette transparent.
Voila! Your Enchanting Portrait of
Maleficent is Finished!
Congratulations on finishing up this stylized Maleficent portrait! I hope you’ve found some useful techniques in
working with soft blurred shapes and textures. Keep drawing and creating new art!


Create the Enchanting Maleficent Portrait in Adobe Illustrator
Geen opmerkingen:
Een reactie posten